Wednesday, June 24, 2015

How we use our cards

So how do we use our cards? I would love to have everything perfect and exactly as described by the program, but what I have realized is if you wait for everything to be perfect you spend so much time preparing that you miss out on the opportunity to actually DO the program. This is why I decided it was better to make the visual stimulation cards and prop them up than wait until I had some perfect hanging system.  It is also why I chose to use visual stimulation cards printed on normal paper and laminated rather than buying foam core board and poster-board and waiting until I had time to create a large foam checkerboard.

The cards are part of the sensory aspect of the program. Currently we are starting stage two of the sensory program. Of the different components of this program we are focusing most on the visual aspect. The auditory and tactile aspects involve stimulating a "vital response" to loud noises or sensation. As both of those responses seem very developed, we only occasionally do these exercises.

There are three parts to the visual program at this stage. Part one is comprised of putting baby in a contrasting environment. Large checkerboards are recommended, however as I said we have opted to use other black and white patterns and she finds them very amusing.
Enjoying her visual stimulation cards
Part two involves bringing baby to a dark room and having her spot a penlight. This is the part that most often gets skipped. Unfortunately, we do not have any rooms without windows, so the only dark place for these exercises is a closet, which makes it a bit of an ordeal. 

Part three involves showing her an outline card 10 times daily. For this first week we change the card daily. She loves when her brothers show her the cards.

Brother teaches the card of the day
We just take the current card of the day out of the binder and tuck it in the front and keep the binder close by. Then throughout the day we just grab it and show it to her. It is convenient because then I also have my checklists close by to document what we are doing.

Crawling Track


Right around week 4 my husband built a crawling track. It's funny that we finally decided to build one with our third child, but we hope to get plenty of use out of it. It is 6 feet long and covered in Naugahyde. The walls are a little shorter than recommended, and I have noticed that her feet kick over the top on occasion, but we decided to be frugal and use what we had on hand.
Contemplating moving forward

Since that time we have begun doing crawling on an incline multiple times daily as well as opportunities on the track with it flat. Unfortunately, we have not been able to reach Doman's goals for time on the track as she tends to either cry hysterically or fall asleep when on the track. We've tried lying next to her so she can see us, putting interesting toys in her line of sight, talking to her, etc. At this time I think it is just building up familiarity with it. So we will just keep going with multiple short sessions a day. 
Crawling on a incline. How Smart is Your Baby recommends raising it to the level that your baby can make it down the track in about a minute.


Here she is on her crawling track on an incline.


Monday, June 22, 2015

5 Week update

Right now our little one is 5 weeks old. Thus far we have been attempting to follow the "How Smart is your Baby" Program. The first month we were not vigilant with the program and getting the number of repetitions recommend. We instead focused on talking to her as much as possible, getting her used to tummy time, grasping, reflex and eye development.


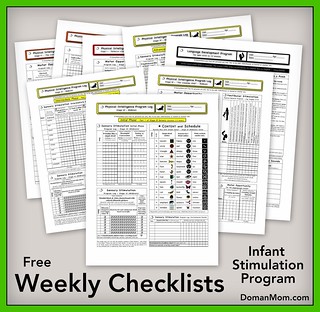
 For the most part she is now on the level two developmental profile, it is only the mobility aspect that she is still stage 1. I have been using the checklists from Domanmom.com and have found them incredibly helpful. It is so nice not to have to flip through the book multiple times a day trying to figure out how many times you are supposed to do what.


I organized everything into a binder. I put her current "choice board" (a simple yes/no) on the front for easy access.  

Her current shape card (square) in the front pouch, and the checklist and the rest of the cards in the binder area. I chose to use my laminator to laminate all the cards to make them sturdy and durable. I then 3 hole punched them so I could organize them in the binder. 
 
 
This week we are introducing the first 7 (square, circle, triangle, star, banana, foot and hand)  and starting with the poetry for the language development. I have decided to use the simple poem included in the book:

When I come home I say "Hi".
When I go out I say "Bye".

I chose this poem because I think "Hi" and "Bye" will be easy words for her to try to say on her own, and ones she hears all the time. In fact, my eldest son's first word was "Hi" at 4 months.

So, if you are using this program, I'd love to hear how you organize your materials.


Saturday, June 20, 2015

Welcome!

Welcome to Rogue Education. The purpose of this blog is to document our early learning adventure with our third child.

Early learning has been a part of my families life since 2006, when my eldest son was born. Using a combination of Gentle Revolution (aka Doman inspired) methods and my own research, trial and error we have been able to help my oldest son to work at an 8th grade level by the age of 9. My middle child is currently 5 and working at a 3rd grade level.

My hope is that this blog can be used as a kind of scrapbook chronicling this adventure with our third child, as well as provide information and inspiration to other early learning families.
 

Our Newest Addition